This post contains Amazon Affiliate links; if you purchase from Amazon after going through these links, Cult of Pedagogy receives a small commission at no extra cost to you.
If the first few classrooms featured in our Classroom Eye Candy series have anything in common, it’s that they have all been very full—full of color and furniture, things hanging on the walls, and other small details that made them interesting and stimulating.
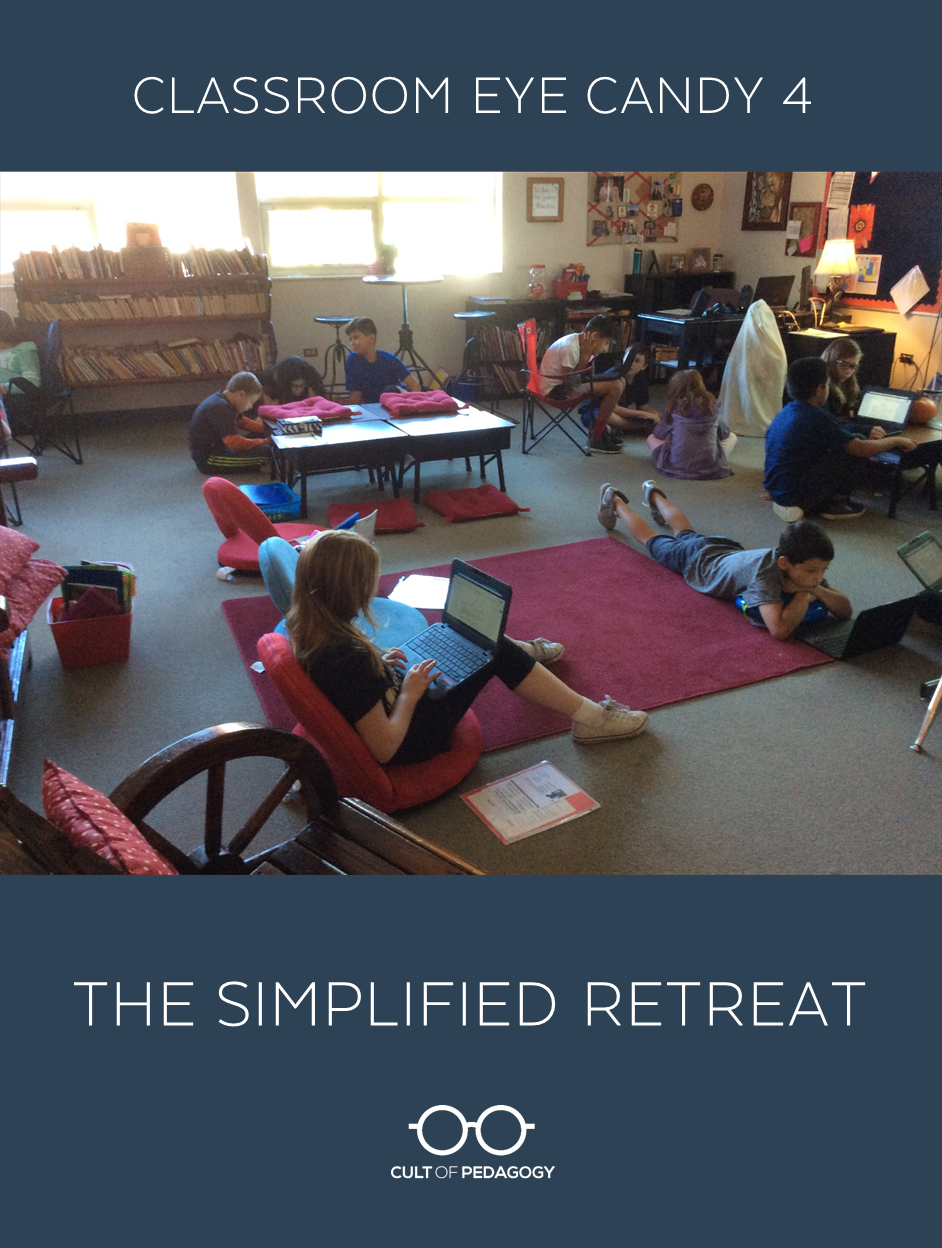
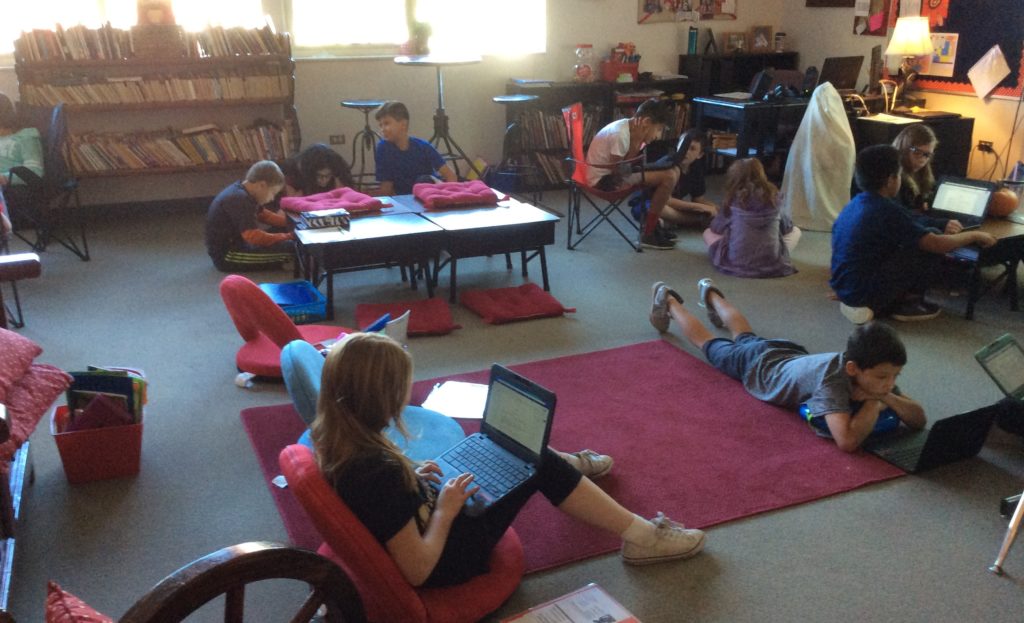
This classroom takes a slightly different approach: Since shifting from traditional to flexible seating this past school year, 5th grade teacher Kelly Almer’s goal has been to continually simplify her classroom as much as possible, giving her students a clean, decluttered space to think and move freely.
 Name: Kelly Almer
Job Title: 5th grade teacher
School Location: Littleton, CO
Q: Tell me about the evolution of this classroom. What motivated you to set it up this way?
I researched the concept of flexible or alternative seating for over a year before I took the plunge this past Fall (2016). Everything I found, with only one exception, were strong testimonials to the benefit of this type of seating. I have been an educator in the same public school district for 31 years. I enjoy trying new things and never have liked staying stagnant.
The idea of flexible seating was worth the plunge. This past year I was told to expect a large class (30+ students). That didn’t excite me. I knew 30 desks plus chairs would take up all the room in my class. We needed to move.
So I decided to change: Eliminate slowly, helping the students adjust to the concept. Every step I took was worth the effort.
My first goal was to provide choice and options for seating to maximize the ability to learn and collaborate. I wanted my students to be able to choose where they wanted to sit, based on their individual comfort and learning mode.
I started by setting up three “seating options” in my room: high, middle, and low. I removed the legs from 12 of my student desks. This allowed for the “low seating”. I purchased cushions from IKEA on top of these for seating comfort. The low seating was set up in groups of 6, 3, and 2 by themselves.
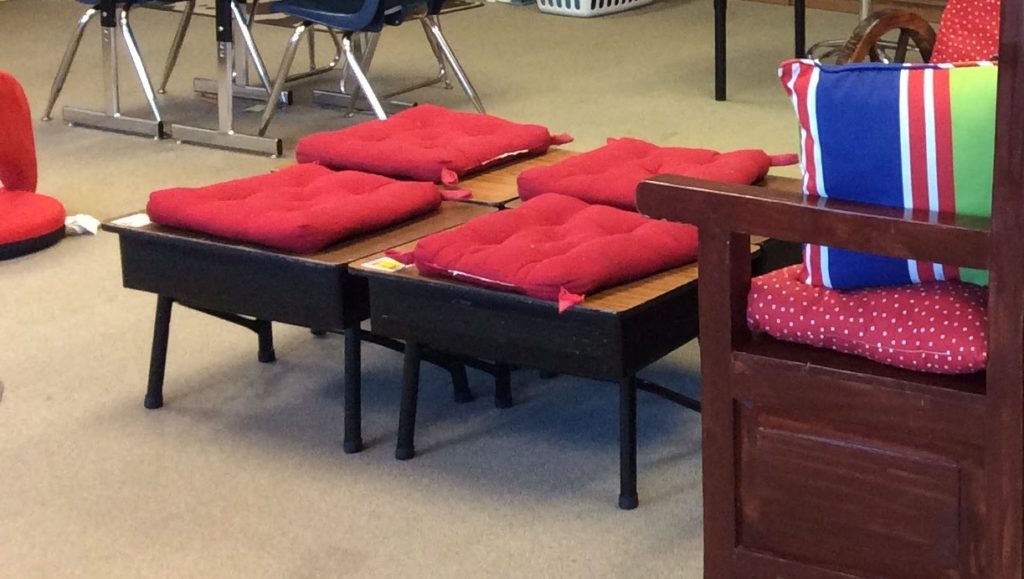
An early version of the low and middle-level seating areas.
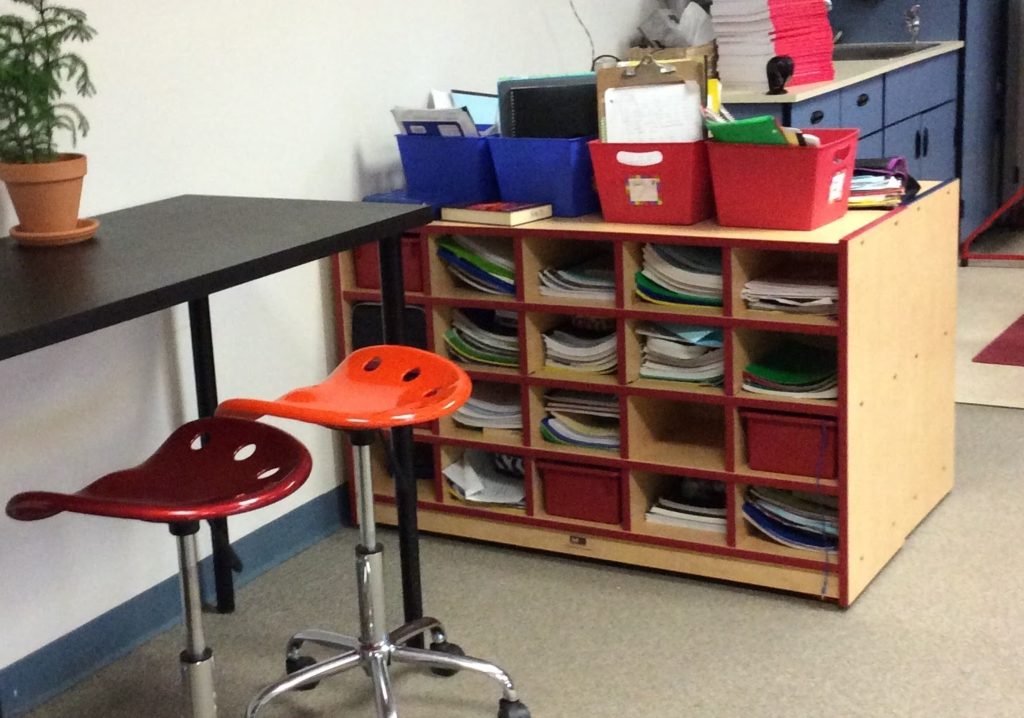
The middle level seating were still the regular desks. I kept the chairs with these. I purchased 3 high tables (also from IKEA: table legs purchased separate from the table tops). I had stools already so students could either sit or stand at these.
Each student was required to try out a different option each day. This helped them determine which location in the room and type of seating (or standing) worked best. One of the rules was to sit/stand where you can do your best work. I had the right to move students when their location wasn’t working for them. This translates to anyone goofing around/ not on task. I simply move their seat, letting them know they could be “comfortable” at the other end of the room. No one can argue with that philosophy. Being comfortable and having every opportunity to learn are the priorities.
My other goal was fluidity. Every piece of furniture is movable in my room. This took a while for students to understand they aren’t “cemented” to one spot all day. If that were true, the classroom would be a glorified traditional learning space with wonderful furniture. Things are in flux throughout the week and I find opportunities to move students, depending on the learning task.

With this arrangement, students do move around more. This takes getting used to but it only takes a short amount of time, and I realized we weren’t disturbing anyone; the learning can still continue. I learned to let go more and so did they. The constant movement kids, those with ADD or ADHD, are able to move easier and it isn’t a distraction. If it becomes too apparent, I simply ask them to walk or stand/move towards the back or side of the room. With people all over the place, this is not noticeable. Some even lay on the floor. We just walk around each other.
Q: How do you handle supplies and storage?
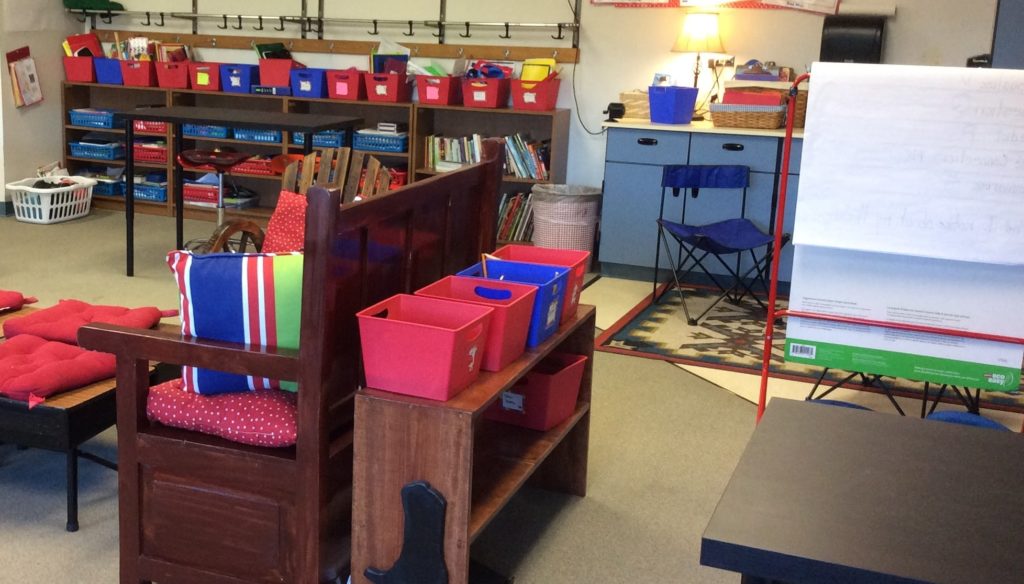
With the removal of desks, I knew I needed storage for supplies. At first, when a desk was removed from the room, two students shared one desk space to store their items. As we eliminated 4-6 desks at a time, sharing of available space was critical. I used some leftover bins from the dollar store (“Savers”) we used until my principal ordered 2 rolling bookshelves/cubbie holders.
The changing space also meant we had to rethink our supplies. We no longer needed 5 folders, 3 spirals, and an excess of other items. Students simplified even further. This, as it turns out, helped them to organize themselves. We realized the desk was a space to “lose” things. Now each student has one storage bin (seen in the photo below), to house all their items. The two rolling bookshelves each hold 20 bins so I have a total of 40 bins: plenty for even a large class. Students take their bins with them, wherever they choose to sit. When they get up and move around they simply take their bin of supplies with them.
Student cubbies and one of the high seating areas.
The students and I have a “common supplies” area in the room, behind the bench. Bins store extra paper, pencils, markers, sticky notes. There is no excuse for missing items. The Lost and Found bin is usually full, which I wish it wasn’t but we can still continue on our day without my waiting for someone to find their pencil.
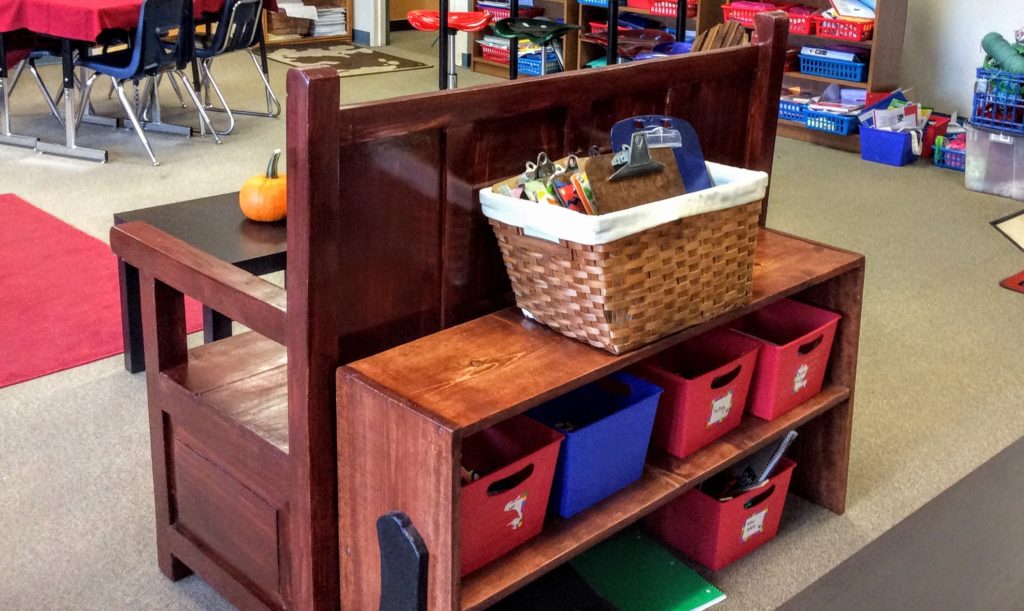
The common supplies area.
Q: Describe the main areas and special features of the room.
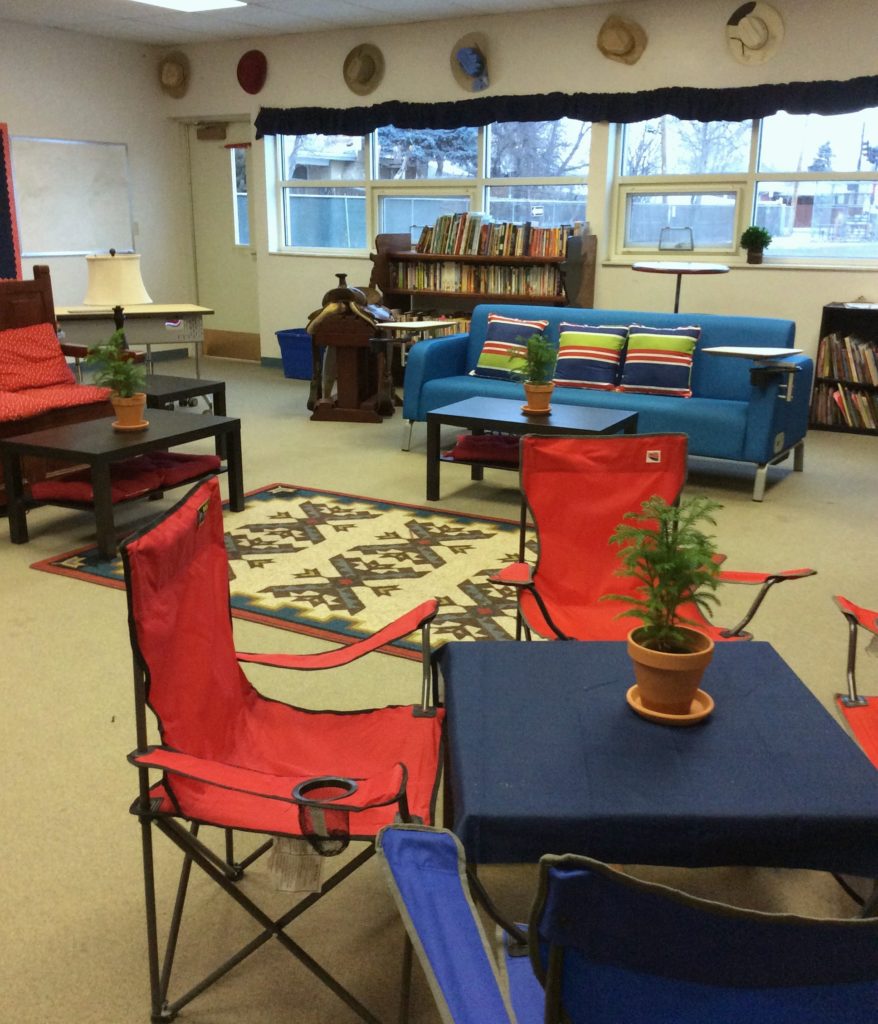
I have several rugs in the room, at designated gathering spaces. My main area is located in the middle of the room. There is a 5 X 8 rug there. The couch, bench, and chair, with the 4 tables, anchor this space.
I have a tall bistro table and stools (purchased from a second-hand store) by the windows. There is a rug there.
I also have 8 camp chairs at the front and back of the room. A simple table (our old school office furniture and IKEA) define these with simple rugs. The rugs were from Goodwill. As the months have gone by this academic year, I have discovered students gravitate towards certain spots. They no longer argue who gets the red chair or the couch. Many love the 2 camp chair areas. A few still prefer the couch, some love the floor at the back of the room.
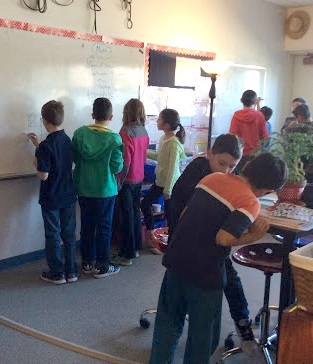
Collaboration: I am in the process of eliminating bulletin boards from my classroom. My back wall is designated whiteboard space. My principal had leftover “Idea paint” and had the district “paint” a dry erase wall next to my closet. I defined this with bulletin board border. Now we have more space to write our thinking. I have students going to these boards and sharing their thinking. They take a picture of their work with their Chromebooks, to document their thinking. They love this. I didn’t realize at the start of the year but we go through dry erase markers more than pencils.
Thinking Charts: For traditional large paper charts, I purchased a chart stand (Amazon). It has metal rings that hold a large paper chart. This houses our thinking charts for math and reading, writing. Students can move the chart around the room and flip to the references they need. It also acts as a partition for small group work areas.
Decorations and color scheme: I don’t have things hanging from the walls, in front of the windows, or from wires. I believe this creates too much “visual pollution”. Simplify what the kids see, keep it simple. What I have on my walls, above my boards, are nice decorations. My color scheme is traditional red (accent color) and navy blue. All of my boards (those that are left) are covered in navy blue fabric and lined with red and white polka dot border trim. I never change the color scheme or the fabric boards. This is year 3 and the color still looks brand new.
My furniture is also red and blue. The theme is cowboy/western. I have antique bridles, cowboy coffee pots, and such, displayed above the dry erase walls and on a shelf (up high). Above my wall of windows, I have evenly spaced cowboy hats. Each year I add one more hat with the students’ thumbprints on it. I suggest keeping to a simple theme and color scheme. Dark bulletin boards (even black) work best.
Q: What other details make this room special?
Lighting and Music: I was never a fan of the overhead lights. I purchased from Lowes, a set of 5 lamps. These are placed at each main gathering spot in the room. My blinds are almost never closed (unless we’re in a lockdown drill). I also play music throughout the day from Spotify to add to the atmosphere.
Snacks: I offer snacks and mints. My school population is 49-51% free and reduced lunch. I offer a bin of snacks: students can pick one a week. They LOVE this. The mints are from Target: Lifesavers mints. They come in a bag of 500. I keep these and pass them out when we are working on a test or studying. My classroom parents purchased a mini popcorn machine for us during the holidays. We have popcorn once a month This is a real treat and adds to the uniqueness of the room. We also have hot chocolate when it is cold out.
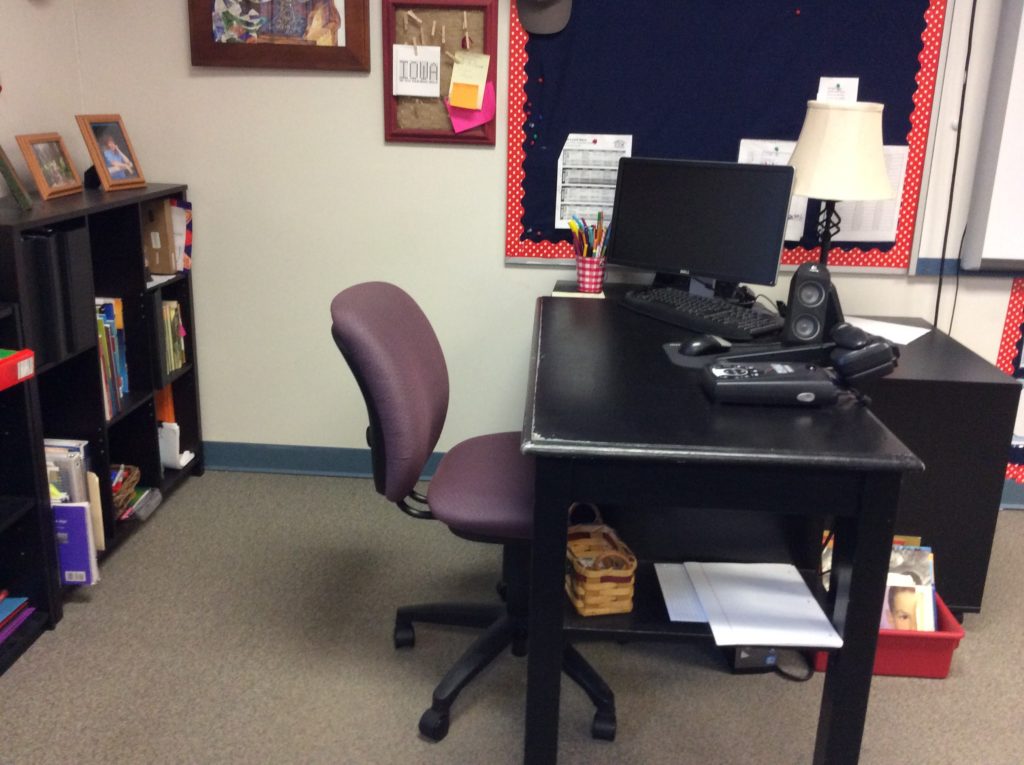
Almer’s desk. Yes, it stays that neat all the time!
Q: What about fire codes?
My district doesn’t have strict fire codes, other than nothing blocking the doors and the blinds must be able to close quickly. In case of a lock down, I placed simple dowels with fabric, above each door’s window. I simply pull the dowel off the door (it is on Command hooks) and the fabric rolls down instantly. I place the dowel back on the hook and it covers the door (Pinterest idea).
Q: Where did you get the materials for the room?
I went through DonorsChoose and PledgeCents. Both were great, getting the wobble cushions, back patter chairs, and other supplies. For the other items, I am not afraid to approach local businesses, asking for their support. They can only say no. Most say yes. It never hurts to ask.
I also believe in garage sales, second-hand stores, IKEA, Walmart, Amazon. I can always find great deals there. I took my clipboards and decorated them, as the other teacher did on a different eye candy feature, for students. I keep these in a bin with the classroom supplies shelf.

The tractor stools are from Walmart.com. They were a bit pricey: $38 each (you can also find these on Amazon). I purchased them seven years ago and they are still as good as ever. Worth the investment.
Q: What advice would you give to someone wanting to simplify their classroom?
Start slow and change a few things. Shorten desks by eliminating the legs. Once you do that, purchase leg stoppers to slip on the ends of the desks, so the floor doesn’t get marked up. Find a tall table in your building for standing space. Think of storage as you eliminate desks. Simplify students’ materials and think of a central location to keep their items and common supplies.
Think of your “teacher area” as well. I am eliminating more of my space, as I don’t spend much time there.
As you change the room, keep in mind you need to help the students think differently. A cool space only works if you are willing to help the kids learn how to work together.
Q: How is the mood of the room different now that you’ve made this change?
I started the switch in August of this school year. I originally had 30 desks, some chairs, traditional chairs. The room was CROWDED. As the transition took place, the students were as excited as me. When the room was finished (for the most part), by Fall conferences, everyone loved it. Parents came to every conference telling me how their student changed so much for the better this year. The atmosphere is very very relaxed. I have almost no behavior problems. The mood is very relaxed and happier. There is a sense of calmness that others in the building remark about. I even feel “relaxed” when I walk in. I will never go back to traditional seating again. ♦
You can read more about the evolution of Kelly’s classroom on her blog, Study Like Starbucks.
Join our mailing list and get weekly tips, tools, and inspiration—in quick, bite-sized packages—all geared toward making your teaching more effective and fun. You’ll get access to our members-only library of free downloads, including 20 Ways to Cut Your Grading Time in Half the e-booklet that has helped thousands of teachers save time on grading. Come on in!!